
Structural Steel FAQ, Part 5 – Assessing Surface Profile
, RoslerUSA - Zurück zur Übersicht
Accurate surface profile evaluation is critical in preparing structural steel for paint and coatings and achieving the best possible adhesion, strength, and longevity.
Structural Steel FAQ, Part 5 – Assessing Surface Profile
Besides the degree of cleanliness – the removal of oil and grease, rust and mill scale, dust, and other contaminants – surface preparation specifications must also consider the surface profile and roughness relative to the coating to be applied. Rosler builds shot blasting equipment to create the right surface profile on structural steel components as well as cleaning them in preparation for coating and painting.
This installment of our Structural Steel FAQ series Rosler will answer What is the optimum surface profile for a structural steel component prior to painting and how is the profile evaluated?
Optimizing for Painting
Shot blasting makes a surface rougher to increase the total contact area between paint and a work piece substrate and generally improves paint adhesion. A surface that is too smooth poses the risk of inadequate paint adhesion, while a surface that is too rough may not cover the peaks.
The degree of surface profile required depends entirely on the coating to be applied. Thin film paint coatings like prefabrication primers require a relatively smooth surface profile, whereas high build coatings (UHB) with thicknesses from 5 up to 30 mils or thermal sprayed metal coatings must have a much coarser surface.
Measuring Profile
With several different assessment options available, measuring the profile of a surface can be a bit confusing. The most widely used assessments include ASTM standards D4417-11 and D7127.
ASTM standard D4417‐11 describes three methods of surface profile assessment.
Method A
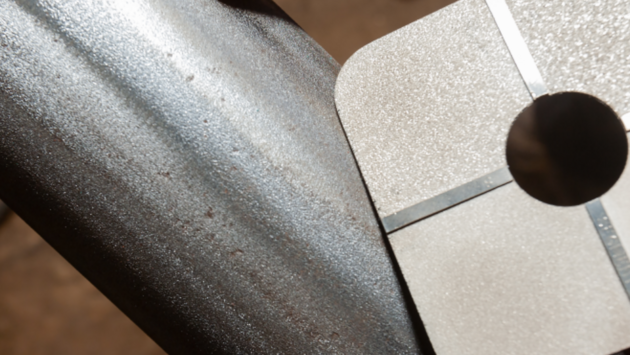
The blasted surface is visually compared to specially prepared sample disks with different surface profile depths commonly referred to as a Surface Comparator. Various versions exist; the most common of which is the “ISO Surface Comparator” as described in ISO 8503‐1 and detailed in the following section.
Method B
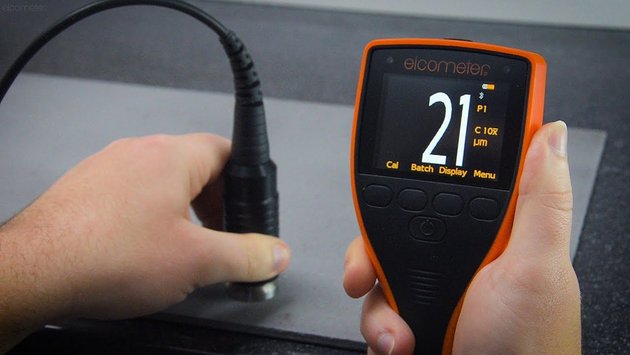
A dial gauge depth micrometer fitted with a pointed probe, commonly known as a digital surface profile gauge, is used to measure profile depth from valleys relative to the peaks.
Method C
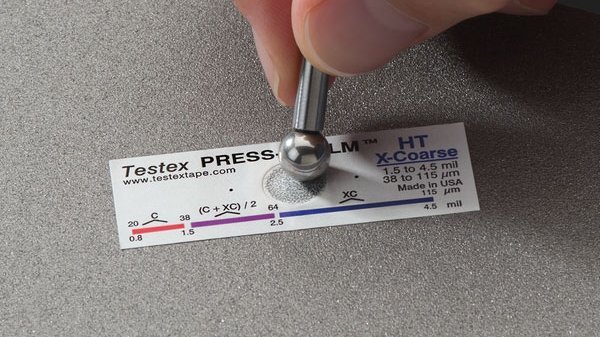
Known as the replica tape method, a replica of the surface profile is created with a foamed plastic tape on a hard plastic film. The tape is placed on the profile and burnished with a round tool breaking the bubbles in the foamed tape, thus creating the profile replica. The peaks and valleys are measured with a spring micrometer.
Analog micrometers are being displaced by digital versions, which can also upload the data directly to a computer.
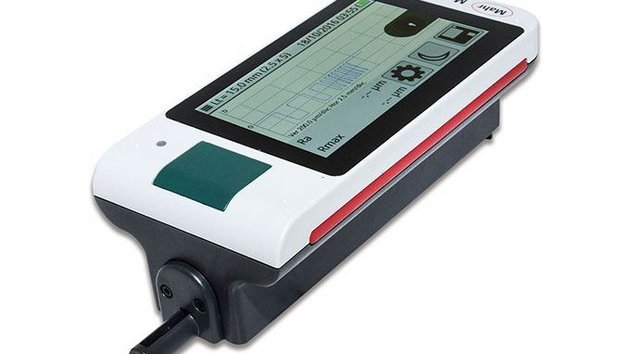
The second common assessment, ASTM standard D7127, uses a portable stylus profile gauge known as a profilometer, which is the most commonly used measurement tool. The stylus traces the peaks and valleys of the surface profile and measures them in Rz and Pc.
Rz is the average maximum peak-to-valley distance within five sampling lengths. Pc stands for peak count and is the number of peak/valley pairs within the same sampling lengths.
Utilizing the ISO 8503-1 Surface Comparator
This method for evaluating profile uses two disks – one for steel blasted with grit and one for steel blasted with shot – each with four different profile segments based on the maximum peak-to-valley height nominal reading (μm).
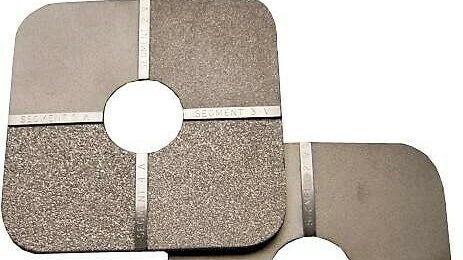
This design allows for quick and easy visual assessment by placing the respective comparator disk on the shot blasted surface and making a visual comparison between the shot blasted surface visible in the center hole and the profiles on the comparator under at least a 7x magnifier.
The ranges of profile grading for grit or steel shot include fine, medium, and coarse.
- Fine – Profiles equal to segment 1 and up to, but excluding, segment 2.
- Medium – Profiles equal to segment 2 and up to, but excluding, segment 3.
- Coarse – Profiles equal to segment 3 and up to, but excluding, segment 4.
Other available visual surface comparators include Keane‐Tator, Rubert, and Rugotest.
The Rosler Way
Whatever your structural steel needs you can count on Rosler to help you find a better way. Contact us today to discuss your unique challenges.